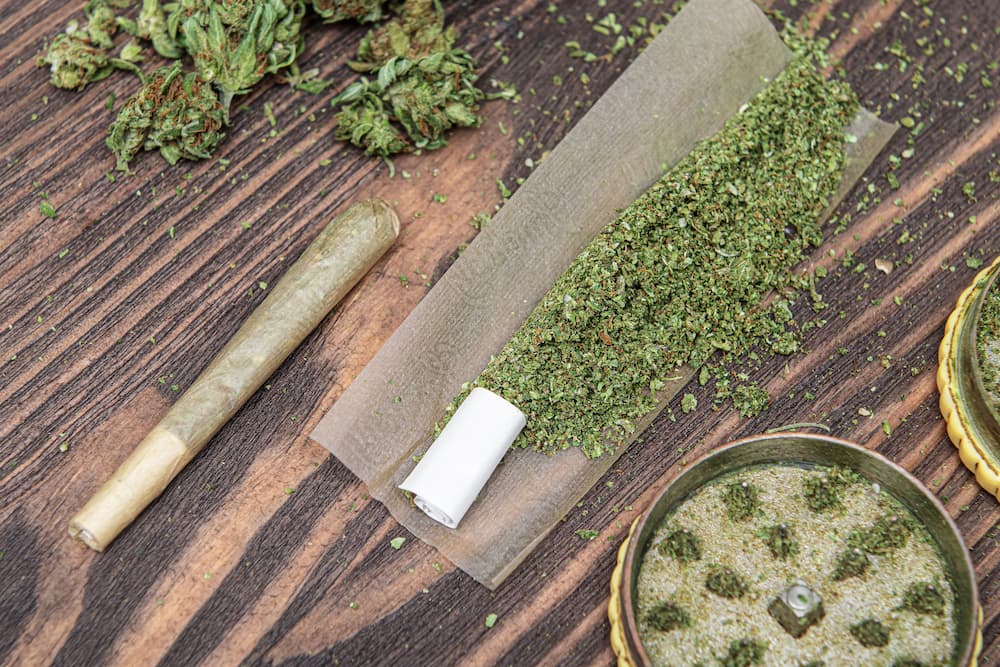
While there are numerous ways of enjoying marijuana, rolling a cannabis joint remains popular among many users. Rolling a joint offers multiple benefits ranging from affordability to longevity. Besides, joints are highly portable if you plan to spend the day out. Ensure that you create joints that burn smoothly and evenly.
To roll a joint, you need to put together essential materials, including:
- Cannabis
- A grinder
- Rolling tray
- Rolling papers
- Filter or crutch
- Pen, chopstick, or a sharp item
How to Roll a Joint
Grind your Plant
The first step in rolling a joint is to break apart the cannabis. Trying to put the full bud might damage the paper. You can use a grinder or hand to break up the plant. The grinder prevents your hands and the paper from getting sticky.
Ensure that you grind up your cannabis finely to remove any lumps when you start rolling. A grinder helps you create a consistent size and texture, providing a more even smoke. Grinding will ease rolling and ensure that your joint burns evenly.
Create a filter and the crease
If you don't want marijuana flowers in your mouth, you might need to take this optional step. Fold the crutch that comes with joint papers accordion-style, in either the shape of an M or a V, before rolling it up. Be sure to roll the crutch to your desired thickness. The crutch lets you enjoy your pot without burning your fingertips. Your smoke shop can sell pre-made crutches that you can use as the joint's mouthpiece.
You'll also need to know how to roll paper before adding anything. Fold the paper in half with the glue strip facing inward. Then, create the line where you will place the weed carefully.
Place Pot in your paper
With the paper in place, you need to start rolling. Spread your ground flower along the crease with the paper held on one side. Be sure to spread the flower evenly to prevent it from overstuffing. Place the filter at the end of the rolling paper while placing your flower in the paper. If you want a cone joint, sprinkle less weed close to the mouthpiece and more towards the tip.
Roll the joint
Once you fill the paper, it is time to start rolling. Pinch the paper with your fingertips and move it gradually back and forth. Keep it slow and steady to ensure that you achieve the perfect shape. This gradual movement will create your paper's cone shape. If you are looking for a simple process, shape the joint before rolling it.
Seal the Joint
Place your thumbs on the joint's front with your fingers on the back. Keep rolling to even it out. Tuck the paper into the joint's unglued side, then lick the other joint’s side slightly to seal it, and you'll be good to go. Start with the crutch side because it will ease how the paper rolls around itself.
Pack the joint
If one joint's end is loose, pack it with more weed. Then, use a stick or key to fill the marijuana down tight in the paper. Use a trim stick or your shoelace's tip to pack it if you are on the go. Properly packing the joint ensures that you get a nice even smoke.
Twist the top, light it up, and enjoy
Once you pack the flower to your liking, twist the top to ensure that everything remains intact. Ensure that you rotate your paper if you don't light it up immediately. Your joint is now ready to use.
Need Help Rolling a Joint?
At Options Medical Center, we have multiple joints that guarantee the best deals in the state. We offer numerous strains that can fill your cannabis joint. Check out our daily specials or contact us to learn more!
Image Source: sergiew / Shutterstock


